
Why does internal wall insulation cause damp problems?
Internal wall insulation causes damp problems because it leaves the original masonry colder and slower to dry. The insulation keeps the room's heat in the room, so the wall behind it no longer gets warmed. A colder wall holds more moisture for longer, and if warm, humid indoor air reaches that cold surface behind the insulation, it condenses there, out of sight. That hidden condensation is called interstitial condensation: condensation that forms within the structure rather than on its visible surface.
The government's IWI best practice guide is direct about the stakes. It warns that if its recommendations are not followed there is a high risk of interstitial condensation. It also sets the goal clearly: appropriately insulated walls should manage the moisture and condensation risk, allowing the wall to dry if it becomes wet and avoiding mould or fungus growth.
Three things change at once when IWI goes on, and all three push in the same direction:
- The wall gets colder, so its capacity to hold water vapour without condensing drops.
- The wall dries more slowly, because the internal drying path is now blocked by insulation.
- The home gets more airtight, so indoor humidity rises unless ventilation is improved.
Should you use a vapour barrier or a vapour-open system?
For solid walls, the government's IWI guide recommends a moisture-open build-up, or alternatively a moisture-closed system with a ventilated cavity of at least 25mm on the cold side. A moisture-closed system without that ventilated cavity is only considered where the wall can still dry outwards, for example where there is an impervious external cladding system, or a cavity wall in good condition with no moisture in the cavity.
The governing principle is the order of the layers. The guide states that vapour permeability of materials should decrease from inside to outside, with the most vapour impermeable layer on the internal surface and the most vapour permeable layer on the outer surface. In other words, make it harder for vapour to get in than to get out. Trapping vapour between two impermeable layers is what causes failures.
| Approach | When the guide supports it | Key requirement |
|---|---|---|
| Moisture-open (vapour permeable, capillary active) | Recommended for solid walls | Build-up allows the wall to dry inwards; thinner systems preserve permeability |
| Moisture-closed with ventilated cavity | Alternative for solid walls | Ventilated cavity of at least 25mm on the cold side; a wind barrier on the cold side of the insulation |
| Moisture-closed without a cavity | Walls with impervious external cladding, or sound cavity walls with no moisture in the cavity | The wall must be able to dry externally |
Thickness is part of this decision, not separate from it. The guide notes that the greater the thickness of insulation, the lower the vapour permeability of the final build-up, and that vapour permeable, capillary active thin internal wall insulation helps reduce moisture risks. Ventilated-cavity systems also add depth, which the guide warns may cause an unacceptable reduction in floor area.
A warning from the guide worth repeating: a laminate board on a timber stud cavity with no ventilation, a poor air barrier and poor external pointing produced black mould growing in the narrow space behind, feeding off wet wallpaper. The cavity itself is not the protection. The ventilation of that cavity is.
What ventilation does a home need after internal wall insulation?
A home needs a fully functioning, preferably continuous ventilation system in operation when internal wall insulation is completed. The government's IWI guide states that no insulation should be installed without assessing the ventilation system, and that the ventilation assessment must follow the process in PAS 2035 Annex C. It also notes that intermittent mechanical extract should not be relied on in buildings with an air permeability below 5 m³/m²hr.
One system is ruled out. The guide states that Positive Input Ventilation (PIV) should not be installed with internal wall insulation, because PIV actively pushes warm, wet air into the building fabric, which increases the risk of interstitial condensation between the wall and the insulation.
The Building Regulations alone are not enough here. The guide points out that Part F requires completed building work to be no worse than before, and says plainly that this "make it no worse" test is often not adequate where internal wall insulation is being installed, which is why the PAS 2035 Annex C process should be followed instead.
PAS 2030:2023 puts the same duty on the installer. Clause 5.2.4 requires the installer to check that the retrofit design includes details of how adequate ventilation will be maintained or provided, to confirm good internal air quality and minimise surface and interstitial condensation risk. Where that detail is missing or looks inadequate, the installer must consult the retrofit coordinator rather than proceeding.
How do you protect timber joist ends embedded in the wall?
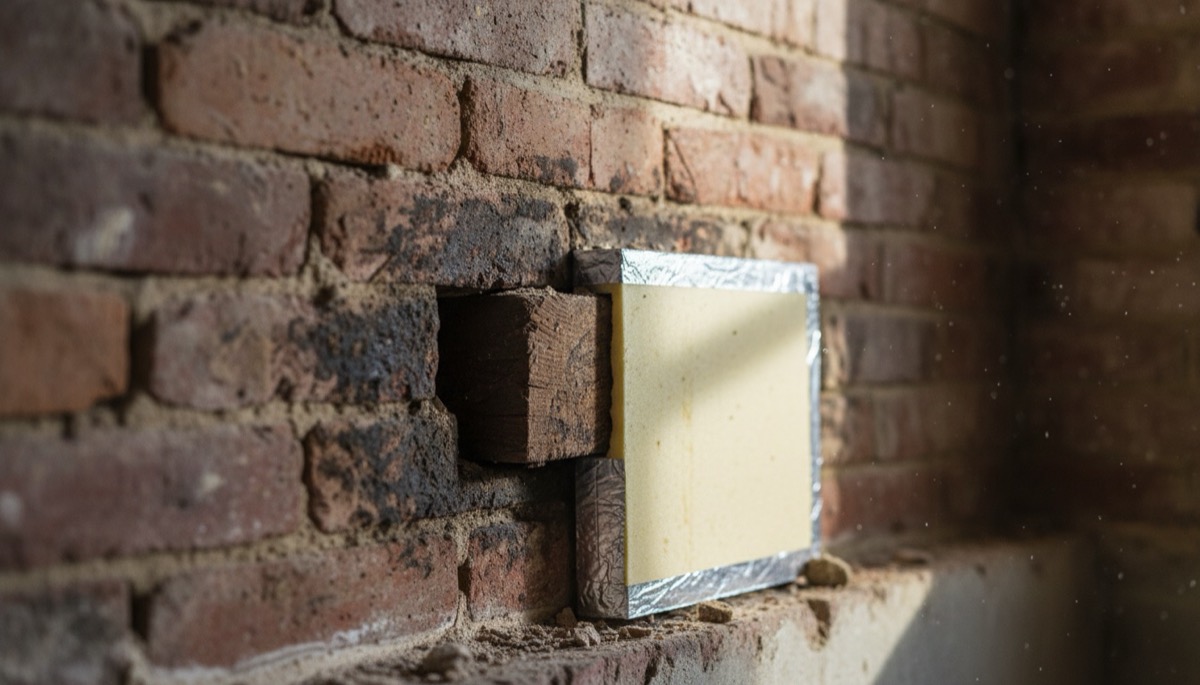
Embedded timber joist ends are the highest-risk detail in internal wall insulation, because insulating the wall makes the pocket around them colder and damper. The government's IWI guide sets a hard threshold: timber moisture content should not exceed 20%, and installation should not go ahead with moisture levels higher than 20% in timber joists embedded in external walls. Timbers are generally understood to be free from decay risk below 20% moisture content.
Measuring properly matters. The guide says to measure joist ends as close to the wall as possible using a moisture meter with electromagnetic capability, which gives greater accuracy and depth. It warns that some decayed timbers keep a surface veneer of sound wood, so suspect timbers should be probed with a sharp implement such as a bradawl, and large sections can be checked by sounding with a hammer. Decay is often localised exactly where the timber enters the masonry.
The guide gives a hierarchy of solutions, best first:
- Remove the joists from the wall and support them on hangers or a thermally broken steel joist. The guide calls this the lowest-risk option: it eliminates the rot risk from a cold wall and lets the insulation run down the wall uninterrupted, avoiding thermal bridges.
- Treat the joist ends where they stay in the wall. The guide notes that injection of boron paste may be considered, as it inhibits mould and fungus growth and prevents joist ends rotting.
- Use thin insulation locally. Vapour permeable thin internal wall insulation of less than 40mm helps reduce moisture risk at joist ends, and may be used only between the joist ends, with thicker insulation above and below.
- Seal around them with vapour-open materials. The guide says joist ends embedded in walls should be made airtight using vapour open products, such as some airtightness tapes or lime render.
How do you deal with thermal bridges and cold spots?
Thermal bridges must be designed out, because a cold spot in a warm room is where surface condensation and mould appear. The government's IWI guide requires that all thermal bridges be mitigated to achieve a surface temperature factor (fRsi) greater than 0.75. Where insulation cannot run continuously around a junction, the guide suggests returning insulation along the junction by a minimum of 400mm, while considering the moisture risk of the wall it returns along.
The junctions that need attention:
- window and door reveals, where returning a thin insulation of under 15mm is described as a good way to reduce thermal bridging
- where IWI is interrupted by internal walls, party walls, intermediate floors or stairs
- where IWI meets ground floors
- where IWI meets ceilings and roofs
Party walls need particular care. The guide warns that returning insulation along a party wall makes that wall colder, which can increase condensation and mould risk in the neighbouring property if it is not suitably heated and ventilated.
Partial installations carry the same problem at a larger scale. The guide notes a surface condensation risk where IWI is installed on only part of an external wall, because the uninsulated part becomes cold once it is isolated from the room's heating.
What checks should happen before installation starts?
Before any insulation goes on the wall, the property should be surveyed for existing moisture, and the design checked for moisture, ventilation and thermal bridging. PAS 2030:2023 (clause 5.2.3) requires the installer to check that the retrofit design provides for management of moisture within the construction, using vapour permeable and capillary active materials as appropriate so moisture does not become trapped and cause damp and deterioration. The same clause covers airtightness and minimising thermal bridging at corners, junctions and edges.
A pre-installation checklist drawn from the government guide and PAS 2030:2023:
- Existing damp: identify and fix the source first. Mould or condensation may indicate poor ventilation, thermal bridging or water ingress.
- Wind-driven rain exposure: check the exposure zone under Part C of the Building Regulations, or carry out hygrothermal risk assessment.
- External wall condition: pointing, render and rainwater goods must be sound, because IWI relies on the wall staying able to dry outwards.
- Joist ends and embedded timbers: measure moisture content, probe for decay, and confirm below 20%.
- Combustion appliances and flues: check whether wall ventilation is needed and that flues stay safe.
- Ventilation system: assess it under PAS 2035 Annex C, and confirm what will be in operation at completion.
- Non-traditional construction: the guide flags non-masonry builds as needing extra care on interstitial risk.
PAS 2030:2023 also notes that inspectors should be familiar with BS 5250, the code of practice for managing moisture in buildings, and that where moisture could be an issue the design may need dynamic modelling of moisture transfer.
Frequently asked questions
Does internal wall insulation always cause damp?
No. Internal wall insulation causes damp when the system, the ventilation or the detailing is wrong, not as an inevitable consequence. The government's IWI guide states that appropriately insulated walls should manage the moisture and condensation risk and allow the wall to dry if it becomes wet.
What moisture content is safe for joist ends before installing IWI?
Below 20%. The government's IWI guide states that timber moisture content should not exceed 20%, and that installation should not go ahead where embedded joists are above that figure. Timbers are generally understood to be free from decay risk below 20%.
Can I install a PIV unit with internal wall insulation?
No. The government's IWI guide states that Positive Input Ventilation should not be installed with internal wall insulation, because it pushes warm, wet air into the building fabric and increases the risk of interstitial condensation behind the insulation.
Do I need hygrothermal modelling for every IWI job?
Not for every job, but it is needed where risk is higher. The government guide points to hygrothermal risk assessment where wind-driven rain exposure is significant, and PAS 2030:2023 notes that dynamic modelling of moisture transfer should be carried out where necessary. The retrofit designer decides, and the installer checks the design covers moisture risk analysis.
What is the difference between surface and interstitial condensation?
Surface condensation forms on a visible surface, such as a cold reveal or a corner, and usually shows as mould. Interstitial condensation forms inside the construction, out of sight, for example between the insulation and the masonry. Interstitial condensation is more dangerous precisely because it is hidden and can rot embedded timbers before anyone notices.
Is external wall insulation safer than internal for moisture?
Generally yes, because the masonry stays warm and keeps drying. That is one of the main reasons to prefer it where the facade can change. Our guide to internal vs external wall insulation compares the two in full.
How Nexis Academy can help
Moisture control is the core technical skill in internal wall insulation, and it is what the qualification exists to teach. Nexis Academy is a City & Guilds Approved Centre (T91185) in Manchester, delivering practical internal wall insulation training aligned to PAS 2035 and PAS 2030. See our internal wall insulation course, or read about internal wall insulation qualifications and how to become a retrofit installer.
Sources
- Department for Business, Energy & Industrial Strategy, Retrofit Internal Wall Insulation: Guide to Best Practice, September 2021: Benefits; Vapour permeability (paras 45–50); Joist ends (paras 53–56); Ventilation (paras 57–58); Thermal bridging (paras 31–33); Less than 100% IWI installation (para 60); pre-installation assessment tables.
- BSI, PAS 2030:2023: clauses 5.2.3, 5.2.4 and 7.2; Annex B.8 and Table B.8.
- HM Government, Approved Document L, Volume 1: Dwellings, 2021 edition incorporating 2023 amendments.